
Start with the King of Nothing on a fresh PC account. It is the initial playable ruler, and its straightforward troops, upgrades and support cards make it the most useful starting point for learning why a kingdom wins or loses. After unlocking alternatives, try Stone for tower defense or Spells for enchantment-based troops. Progress is better saved until you understand placement and card order.
This is a starting recommendation for learning version 0.9.8, not a claim that Nothing has the highest current win rate. The best first ruler is the one that lets you see and correct a mistake. A specialist can become stronger for your chosen strategy later, after you have the cards, perks and understanding that make its engine work.
Start with the deck you can explain
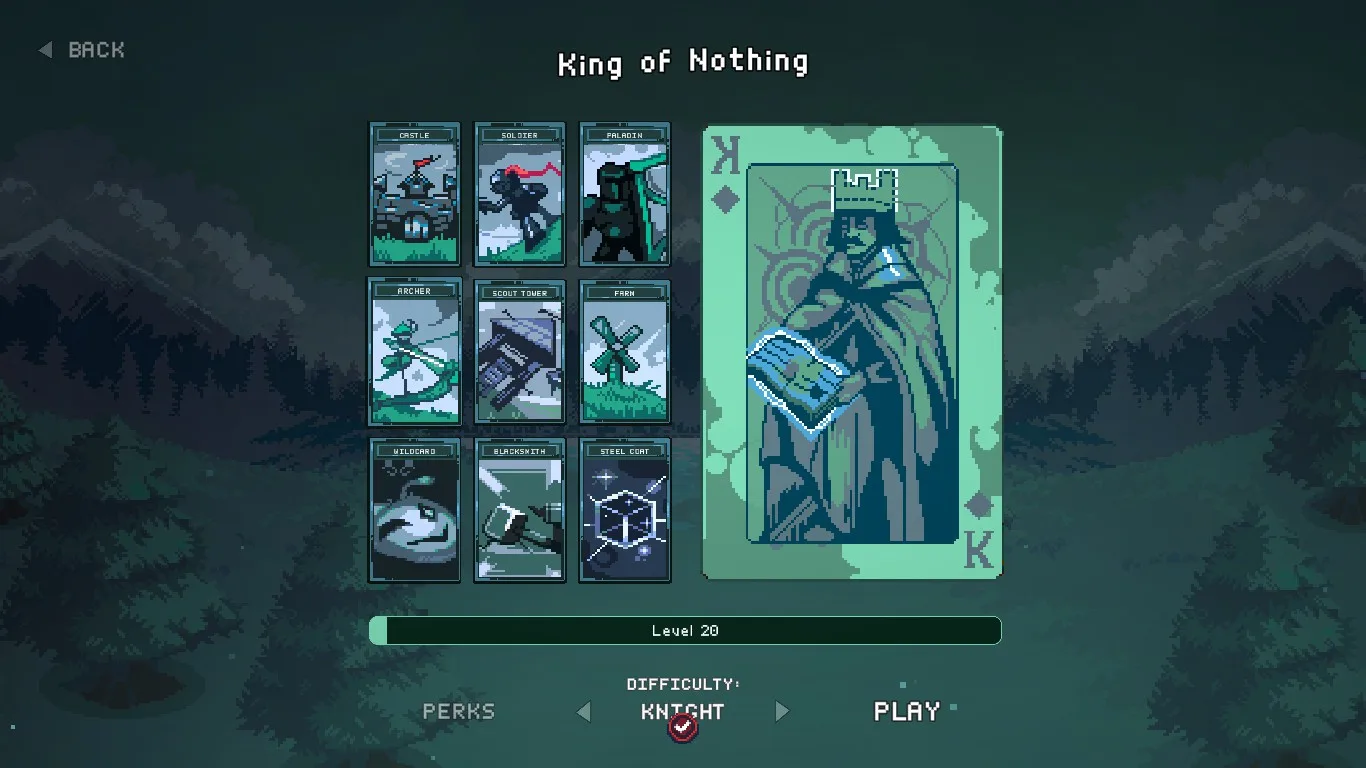
Ruler identification screen; this older illustration may show a previous deck arrangement. Read current tooltips for card effects.
Nothing introduces combat and support as separate jobs. Soldiers and Paladins occupy the melee role, Archers attack at range, and Scout Tower gives a construction-based damage option. Farm, Blacksmith and Wildcard show how a small kingdom improves without simply filling every open plot with another unrelated attacker.
That distinction is valuable in your first runs. If the enemy reaches your base, you can examine whether the frontline died, the attackers lacked damage, or a support building did not reach the intended plot. Those are concrete problems with recognizable solutions. You do not need to understand a long destruction chain before you can improve the board.
The Castle also gives the ruler a visible base role. Keeping that base safe remains part of the task even when your troops appear numerous. Treat your first kingdom as a set of jobs: a protected base, units that buy time, units or towers that defeat enemies, and support that develops the fighting force.
Patch #31 slightly buffed Soldier. Old launch-era descriptions that dismiss it as a poor card are therefore an unreliable reason to avoid Nothing. More importantly, the starting recommendation does not depend on a single unit winning every battle. It depends on a deck whose pieces can be used sensibly when the reward choices are imperfect.
The first skill to learn before changing kings
Watch a battle long enough to identify the first failure. If your melee units disappear before the ranged force can contribute, damage support alone may not solve the problem. If your frontline lasts but enemies continue accumulating, another defensive plot may only postpone the same failure. Diagnose the job that is missing before you change your king.
Nothing makes this lesson fairly direct. A Farm develops troop numbers; a Blacksmith develops damage around it. The support building is useful only if the receiving plot can use that effect. A Farm beside a troop you intend to remove is a poor investment, while a Blacksmith positioned away from your important damage dealers fails to serve the plan.
This is also why the best starting king is not necessarily the ruler with the most dramatic late-game screenshots. Those screenshots usually show a finished engine. Your first problem is reaching a stable intermediate board using the hand you actually receive. Learning how to identify that intermediate board transfers to every later ruler.
For a first-run objective, aim to explain the strongest plot and the weakest link after each fight. That creates a practical learning loop: observe, choose one improvement, and check whether the next battle changed in the way you expected. An early loss can still teach more than copying an advanced recipe whose crucial interaction you cannot identify.
Keep your first board readable
Reserve useful adjacency positions for support instead of placing the Castle in the center automatically. A back or corner base position can leave better access for a central support building, but inspect your actual available plots. The principle is to give support valuable recipients; it is not a universal instruction that every base must occupy the same square.
Do not fill empty plots merely to make the kingdom look complete. A duplicate that upgrades an established fighting plot can be more useful than a new low-level attacker with no support. On the other hand, a second troop can be the correct choice when the first cannot hold enough enemies away from the base. Decide from the battle, not from a blanket rule favoring upgrades or expansion.
Keep only one modest opening plan in mind. For example, protect a melee plot, develop an attacker, and place a support building where it helps the existing force. This is enough structure to guide choices without requiring a specific off-faction card. You can use rewards from rival kings when they solve the missing job.
Before ending the placement phase, check the card preview and adjacency. Current interfaces show upgrade effects and card stats more clearly than older versions. Use that information to decide whether a proposed play improves the right plot. You should be able to point to the recipient and explain the benefit before committing a valuable card.
Choose a second king by the lesson you want
| What you want to learn next | Good next ruler | What to pay attention to |
|---|---|---|
| Tower damage and defensive time | Stone | Which defenses buy time for the towers |
| Enchantment recipients and growth | Spells | Which troop receives support and remains protected |
| Health and population development | Nature | Whether immediate survival allows long-term growth |
| Sacrifice costs and summon value | Blood | What is lost and what benefits from the loss |
| Gold as a combat resource | Greed | The fighting board after spending gold |
| Ordered upgrades and recycling | Progress | The exact trigger produced by each card play |
| Movement and plot reuse | Nomads | The sequence of moving, clearing and replacing plots |
| Time-themed mechanics | Time | Current tooltips rather than old extreme-scaling recipes |
This table is a learning order aid, not a tier list of all rulers. You do not need to follow the rows from top to bottom. Pick the mechanic you already recognize in a borrowed card, then try the king whose starting deck makes that mechanic easier to explore.
Stone as the next step for defensive players
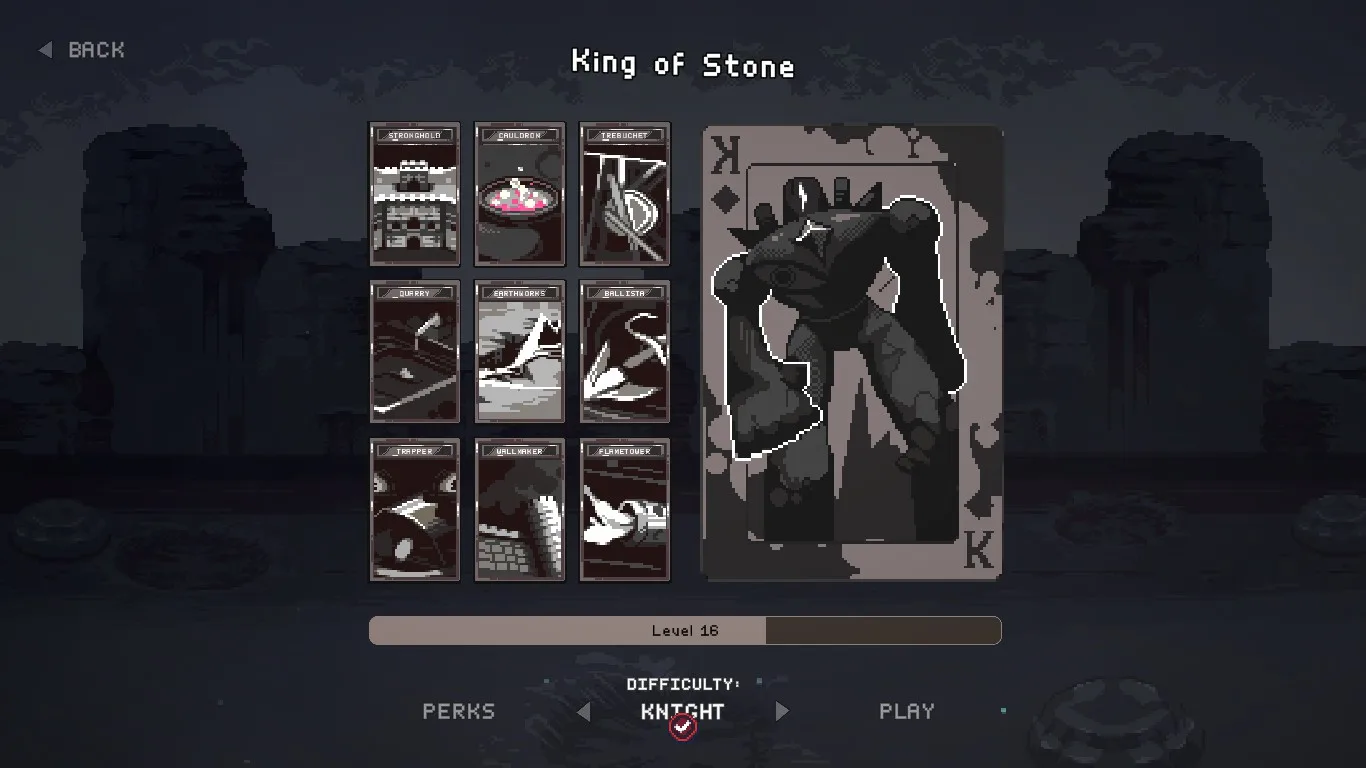
Ruler identification screen; this older illustration may show a previous deck arrangement. Read current tooltips for card effects.
Stone is a sensible second ruler if you like identifying a damaging construction and building a defense around it. Quarry supports tower damage across the kingdom, and Wallmaker supplies a defensive layer. Trebuchet and other siege tools make constructions central to reward decisions.
The important lesson is that tower damage and battlefield time work together. A tower with impressive attack is not useful if the enemy reaches the base before it completes enough attacks. Conversely, more defense is not a complete answer if the existing damage cannot clear the wave. Choose support according to the actual constraint.
Stone has changed since many early guides. Trebuchet projectiles gained area damage in the deck rework, and Trapper received stun and troop-count improvements before another damage increase in Patch #31. These changes make it worth reading the present card descriptions. Do not reproduce an old plan purely because it was once called the easiest achievement build.
As a learner, keep the tower plan small enough to observe. Identify which construction is dealing useful damage and which plot is protecting it. If you cannot tell, avoid adding a second elaborate engine until the first one has a clear role. That habit is more valuable than discovering a large assortment of individually strong cards.
Spells after you understand support placement
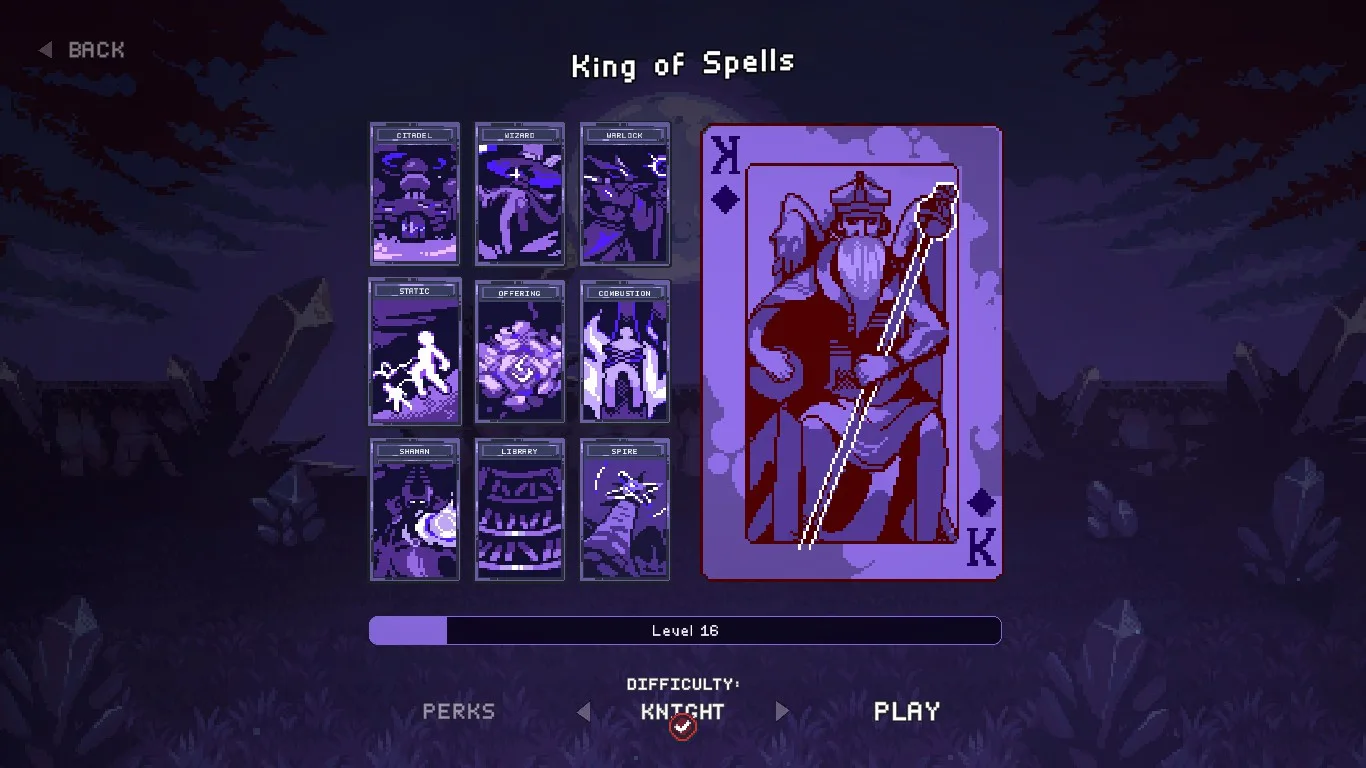
Ruler identification screen; this older illustration may show a previous deck arrangement. Read current tooltips for card effects.
Spells can be a useful second choice when enchantments appeal to you. Library gives a reason to place recipients carefully, and the deck provides different troop roles. Wizard is a ranged damage option, Warlock supplies a melee presence, and Shaman supports other troops rather than behaving like an ordinary attacker.
The learning challenge is that a support-heavy hand may look stronger than the board it produces. An enchantment requires a suitable recipient. A Library requires a useful neighboring troop and time to provide value. If you have neither, building more support can leave the next battle weaker than a simple direct upgrade would have made it.
For your first Spells run, concentrate investment in a recipient that already performs a useful job. Protect it before relying on future enchantment growth. When another card appears, compare it against the missing requirement: recipient, protection, speed, damage or another specific need. This avoids collecting attractive effects without creating a fighting force.
Patch #31 fixed a broken Surge and Library interaction. If a tutorial promises automatic success from that interaction, it should not govern your opening. Legitimate enchantment stacking still gives Spells an identity; the recommendation does not depend on an exploit remaining available.
Why the more elaborate rulers can wait
Progress is an appealing king once you enjoy planning upgrade triggers. Lab Rats respond to neighboring upgrades, and Recycler connects discarded cards to nearby growth. But a beginner may spend several turns assembling a chain while missing the immediate defense. That makes Progress a less direct first classroom even when its eventual engine is powerful.
Blood asks you to accept useful losses. Allied deaths and destroyed units can feed summons or growth, while some cards consume adjacent troops. A new player who has not identified the engine's recipients may interpret any death as success. The real test is whether the benefit arrives soon enough to keep the kingdom alive.
Greed introduces a different trade-off. Mercenary count depends on the gold reserve, while shops and rerolls encourage spending. A purchase can improve one part of the board while reducing another. Start it when you can compare the post-purchase fighting force, rather than judge every shop card separately.
Nature, Nomads and Time also reward their own forms of planning. None must be avoided forever. The point is to give each a concrete learning objective when you first select it. Choosing a new ruler because you understand the mechanic it will teach is more productive than repeatedly switching because a previous run lost.
Use the perks your account actually owns
A first-time ruler selection should account for progression. Perks come from leveling kings, and your unlocked selection will differ from a developed account shown in an older guide. A recommendation demanding a particular perk multiplier layout is not a complete starting recommendation if those rainbow perks are still locked.
Use available effects that strengthen the opening you intend to play. An extra useful card or a direct survival benefit can be easier to apply than an effect tied to a troop you have not planned to place. Read the current perk descriptions, because Patch #30 reworked several and Patch #31 changed Destructive again.
Do not wait for a missing advanced loadout before learning a new ruler. Lower-pressure runs can reveal the deck's role relationships using ordinary cards. If the experiment fails, record the missing job in the board, then change a card choice or placement next time. This gives the next attempt a testable purpose.
For multiplayer, check the season's decree pool before importing a specialist opening. The current pool appears in the lower-left lobby. If your lesson is basic placement or a newly unlocked deck, a regular singleplayer run keeps the objective clearer while you build familiarity.
A practical first-session target
Stay with Nothing until you can identify a carry, its support and the reason a battle went wrong. Then choose a second ruler around one mechanic you want to learn. After that run, compare decisions rather than only the ending year: whether upgrades reached useful plots, whether support arrived before it was needed, and whether the kingdom had a working answer to the enemy.
That gives you a durable starting choice and a reason to move beyond it. Nothing teaches the relationships with the fewest specialized assumptions. Stone, Spells or another unlocked king can then teach a particular engine without forcing you to relearn basic survival at the same time.